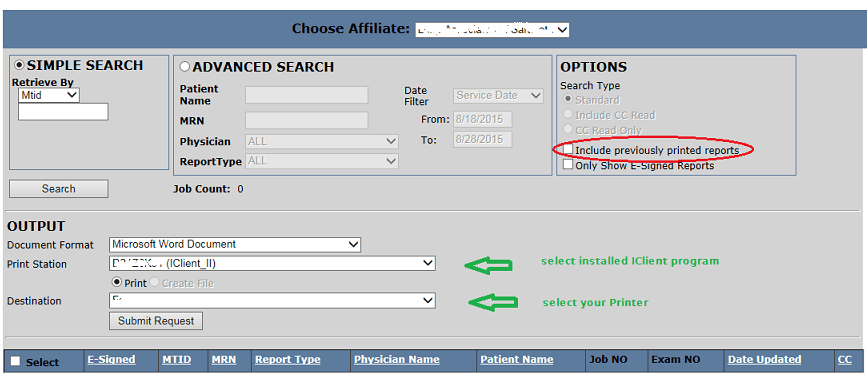
To retrieve and print a transcribed document, click on ‘File Delivery‘ on the menu bar and then click on ‘Print Manager‘ which will display another submenu where you will then click on ‘Search For Records To Print.’The Search For Records To Print page contains a form for entering search criteria and selecting the appropriate printer to be used. The image below is an example of this page:
Search Criteria
There are two basic search areas a user can use. The default area is the Simple Search area where you simply type in the MTID number of a transcribed job. The second area is the Advanced Search which gives you the ability to search by Patient Name, MRN (Medical Record Number), Physician and/or Report Type. When using the Advanced Search area, after entering in one or more values in the available fields, you will also need to set the date range to search in. There are four Date Filter options to select from – Service Date, Dictation Date, Date Received and Date Updated. The Service Date will search by the Dates of Service; the Dictation Date will search by the date the report was dictated, the Date Received will search by the date the dictation was uploaded into the MedLite Intrascript system; and the DateUpdated will search by the date the report was last modified. Once you have selected the appropriate Date Filter option, then set your desired From and To dates – these will be set for a ten day range by default.One last thing to check! On the right side of the Search form in the Options box you will see a checkbox for ‘Include previously printed reports‘. If you only want to see reports that have not been printed yet, leave this checkbox unchecked. However, if you would like to include all reports, printed and unprinted, then please check this checkbox.
OUTPUT
In the Output section of the Search form, there are two fields to which you must pay attention. The first is the Print Station which is where you would select the appropriate IClient program installed at your facility. The Printer Station name in the dropdown list is associated with the computer name where the IClient program is installed. The second is the Destination dropdown box which is used to select the printer which you would like to use for printing. If you use the same printer consistently, these values can be preset in your User settings. You may contact MedLite support to have these settings added to your personal User settings.Now that you have your Search criteria set and have checked your Output options, simply click on the Search button below the SIMPLE SEARCH area.
Selecting Documents to Print
If transcribed documents were found that match your search criteria, the documents will be listed in a section below the Output section of the Search form, as shown below.Check the checkbox on the left of the Search Results list for the document you would like to print or check the Select checkbox to select all documents in the list.Now that you have selected the document(s) to print, simply click on the Submit Request button in the Output section.
 The Search For Records To Print page contains a form for entering search criteria and selecting the appropriate printer to be used. The image below is an example of this page:
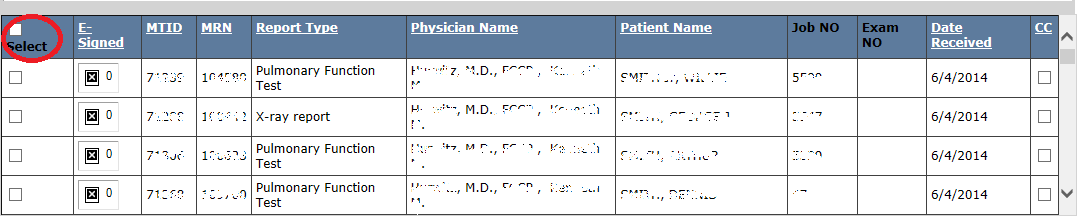 Check the checkbox on the left of the Search Results list for the document you would like to print or check the Select checkbox to select all documents in the list.
Now that you have selected the document(s) to print, simply click on the Submit Request button in the Output section.
Check the checkbox on the left of the Search Results list for the document you would like to print or check the Select checkbox to select all documents in the list.
Now that you have selected the document(s) to print, simply click on the Submit Request button in the Output section.